HAMU - Rack Extensions
Rack Extensions for Propellerheads Reason
WELCOME TO THE HAMU WEB SITE OF
RACK EXTENSIONS FOR PROPELLERHEAD REASON
We love patch cables. The back plane of Reason is the place for creativity and magic. Our Rack Extensions is our humble contribution to empower all experimentalists with more flexibility and tools for the exploration of Sounds!
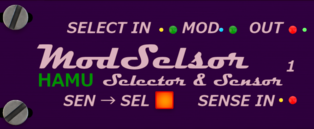
ModSelsor

The ModSelsor enables you to select and sense CV signals in a variety of ways.
Bottom row is a Sensor, where the output index level indicates which of up to 24 CV inputs has the highest level at each moment.
A CV level on the single Selector input will activate one of the up to 24 outputs, to a level set by a modulation input, or default 1.0V.
- The Selector input sensitivity automatically adjusts to the number of output you connect.
- There is a Hold option which will retain the level on each selector output after it has ceased to be selected.
- Selected Sense output socket will output the sense input of the currently selected position.
- The Sense to Select option will use each sense input - if attached - as select output when selected.
- The index and level outs of the Sensor are of course still available.
Look for ModSelsor in bundle ModuleMaker CV Tools!
BASIC FUNCTION
THE SELECTOR
The CV level on the single input socket will select one or none of the up to 24 outputs.
The cable connections define how the input level is mapped to the outputs.
There are several ways to modulate the ooutput levels.
THE SENSOR
The index output level indicates which input socket has the highest level at the moment. This is quite the opposite from the Selector, and the level mapping is similarly defined by the last used sense input socket.
An additional output is provided, always set to the current highest sense input level, i.e. the momentary maximum input level.

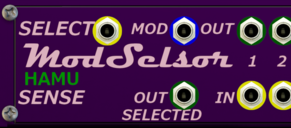
INPUTS & OUTPUTS, SOCKETS, SWITCHES, LAMPS
ModSelsor is mainly a unipolar CV device.
Inputs will however accept any levels, but make sure to understand how negative values are handled before you rely on a particular behaviour.
SELECTOR
Basic function of the Selector:
- The level on the Select input will select one of the active outputs.
- The input range between 0.0V and 1.0V is evenly split between the active outs.
- The last (highest) used (connected) socket and all positions below are active.
- A negative Select in level will de-select all outputs, i.e. all will be 0.0V and the select input LED will show a very dark orange glow (-0.1V).
- Positive values above 1.0V will be clamped to, and count as, 1.0V.
- The red output indicator LED of the selected output will be lit.
Selector example 1:
Understanding select in autoadjusting levels.
- When you put cables only in selector output sockets 1 & 2 this means
- ...the input level range 0.0V-0.5V will activate socket 1, while
- ...the input level range 0.5V-1.0V will activate output 2.
Select modulation input
Since release 1.1.0 the level of any selected output can be set by a global modulation input. When no mod cable is connected, the output level will default to +1.0V.
Sense to Select switch
Release 1.2.1 introduced a Sense → Select option, activated by a switch button. This will use the Sensor input of a position, if attached, as level source for the select output of that same position.
Selector example 2:
Selecting level from one of several sources to a common target.
- Connect 8 different CV signals to the Sense inputs.
- Connect the sense Selected Out to some instrument modulation input.
- Connect a CV input to the Select input, e.g. from a ModPanel fader.
Now you're able to assign any of those 8 different CV signals to your modulation target, by pushing the fader up and down.
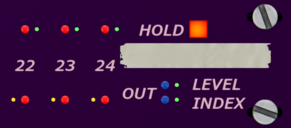
Hold switch
Also since release 1.2.1 you have a switch button for the Hold option. This will leave any select output level where it is, when the position is de-selected. When selected next time, it will again get continuously updated to it's sense input, select mod input or 1.0V.
Selector example 3:
Controlling several targets from the same CV source.
- Connect 8 different targets, e.g. instrument modulation inputs, to the Selector outputs.
- Connect a CV signal to the Selected Mod input, e.g. a ModPanel fader. This will be your level controller.
- Connect a CV signal to the Select input, e.g. from a ModPanel knob. This is now the target controller.
- Switch on the Hold option.
You're now able to handle any of those 8 different CV target levels from the same fader, after selecting target with the knob.
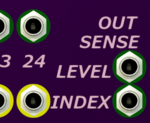
SENSOR
Basic function of the Sensor:
- The Sense index output will indicate which of the active sense inputs is highest.
- The index range is 0.0V to 1.0V and is split evenly between active sense inputs.
- The last (highest) used (connected) socket and all positions below are active.
- Any input level is accepted, so negative levels are lower than open sockets (0.0V).
- If more than one socket have the same level, the first (lowest number) is considered the highest. Also applicable to open sockets!
- When no input cable is connected, the output index level will be negative (-0.1V). The LED will have a very dark purple glow.
- Should all active inputs be negative, the sense level output will also be negative, and the level LED will reflect this.
- There's no clamping of input or output levels, so the sense level output will be exactly the same as on the corresponding input.
- The red input indicator LED of the currently highest input will be lit.
Sensor example:
Understanding the sense index output autoadjusting levels.
- You put cables only in sensor input sockets 1 & 2 , and get the following outputs
- When input 1 is the higher, the output sense index level will be 0.5V.
- When input 2 is the higher, the out index level will be 1.0V.


DOWNLOADS AND VIDEOS
ModSelsor
This video is simply a basic presentation of this Rack Extension.
There is no patch available to accompany this,
and so there is nothing to download.
CV Modules
This video briefly describes a quite complex setup , including lots of Hamu devices.
Should you happen to be one of the very few deeply interested users, you must check it out! Use this link to download the entire combinator patch of the video! =)
The End